- Prioritize Ergonomics Over Aesthetics: A desk must be at a height that prevents slouching, and a chair must support the lumbar spine, regardless of the vintage style.
- Safety First with Older Materials: Always check for lead-based paints (pre-1978 in many countries) and structural stability before beginning any restoration work.
- Focus on Modular Flexibility: Use furniture with casters or lightweight materials so your home-schooling setup can transition from a dedicated learning zone to a shared living space.
Creating a dedicated home-schooling environment doesn’t require a massive budget or a trip to a high-end office furniture retailer. In fact, some of the most functional, durable, and inspiring learning spaces are built using pre-loved, second-hand furniture. By sourcing quality pieces from thrift stores, online marketplaces, or local community exchanges, you aren’t just saving money—you are curating a space with character that can grow alongside your child.
However, moving from a “good find” to a “functional classroom” requires more than a coat of paint. It demands a strategic approach to restoration that balances aesthetics with the physical requirements of a growing student. Whether you are refurbishing a mid-century desk or reinforcing a sturdy wooden chair, this guide will walk you through the essential process of building a home-schooling setup that is both sustainable and highly effective.
Why Second-Hand Furniture Often Outperforms Modern Budget Options
When you walk into a big-box store, you are often met with “fast furniture”—pieces made from particleboard, veneer, and plastic connectors. While these items are affordable, they rarely withstand the daily rigors of a home-schooling environment. A desk that wobbles during a math session or a chair that loses its structural integrity after six months of use is not just an inconvenience; it is a distraction that breaks your child’s concentration.
Second-hand furniture, particularly pieces manufactured before the 1990s, often features solid wood construction, dove-tail joints, and heavy-duty hardware. These pieces were built to last, often surviving decades of wear. For a parent, this means you can sand down a surface to remove scratches, tighten a joint to stop a wobble, and apply a fresh finish to make it look brand new. You are essentially buying a foundation that can be repaired indefinitely, whereas most modern budget furniture is designed to be discarded once it fails.
Moreover, the environmental impact of choosing second-hand is significant. By keeping existing furniture in circulation, you avoid the carbon footprint associated with manufacturing, shipping, and packaging new items. For families in their 30s and 40s who are increasingly conscious of their ecological footprint, this is a tangible way to teach children about sustainability through practice rather than just theory.
Establishing Your Criteria: What to Look For at the Thrift Store
Not every second-hand piece is a candidate for restoration. Before you commit to a purchase, you need a set of decision rules to ensure you aren’t bringing home a project that will drain your time and budget. The most important factor is the structural integrity of the piece. Look for solid wood frames. If you see signs of wood rot, heavy mold, or termite damage, put it back. These issues are often cost-prohibitive or impossible to fix safely.
Next, consider the proportions of the furniture. Home-schooling requires specific ergonomic needs. A standard adult desk is usually 28 to 30 inches tall. If your child is in elementary school, this will be too high. Look for desks that can be adjusted or, more realistically, look for chairs that can be paired with footrests or adjustable stools. If you are buying a chair, the “seat-to-desk” ratio is critical. Your child’s elbows should be at a 90-degree angle when typing or writing, and their feet should be flat on the floor or a stable surface.
The “Stability Test” for Used Desks
Always perform a physical stress test before buying. Apply pressure to the corners of the desk. If it sways, it is likely that the joints are loose. This is a common issue with older furniture, but it is easily fixed with wood glue and a few clamps. If the wood itself is splintering or cracked at a major joint, however, move on. A desk that cannot hold a laptop and a stack of textbooks is a liability, not an asset.
| Feature | What to Check | Decision Rule |
|---|---|---|
| Frame | Check for solid wood vs. particleboard. | Only buy solid wood for long-term use. |
| Joints | Push and pull to check for movement. | Minor wobble is okay; major structural cracks are not. |
| Surface | Check for deep gouges or chemical stains. | Surface scratches are fine; deep gouges require extensive filling. |
| Hardware | Check if drawers slide easily. | If tracks are missing, they can be replaced; if wood is warped, avoid. |
The Restoration Workflow: From Thrifted Find to Classroom Ready
Once you have secured your piece, the restoration process should be systematic. Avoid the temptation to rush straight to painting. Proper preparation is what separates a DIY project that looks “homemade” from one that looks like a professional, high-quality workspace.
Step 1: Deep Cleaning and Safety Assessment
Before sanding, you must clean the piece thoroughly. Use a mild degreaser to remove years of dust, wax, and grime. If you are in the United States or Europe, be aware that furniture finished before the late 1970s may contain lead-based paint. If you suspect this, use a lead-testing kit (available at most hardware stores) before you start sanding. If the test is positive, do not sand the piece. Instead, use a paint stripper or paint over it with a high-quality encapsulating primer.
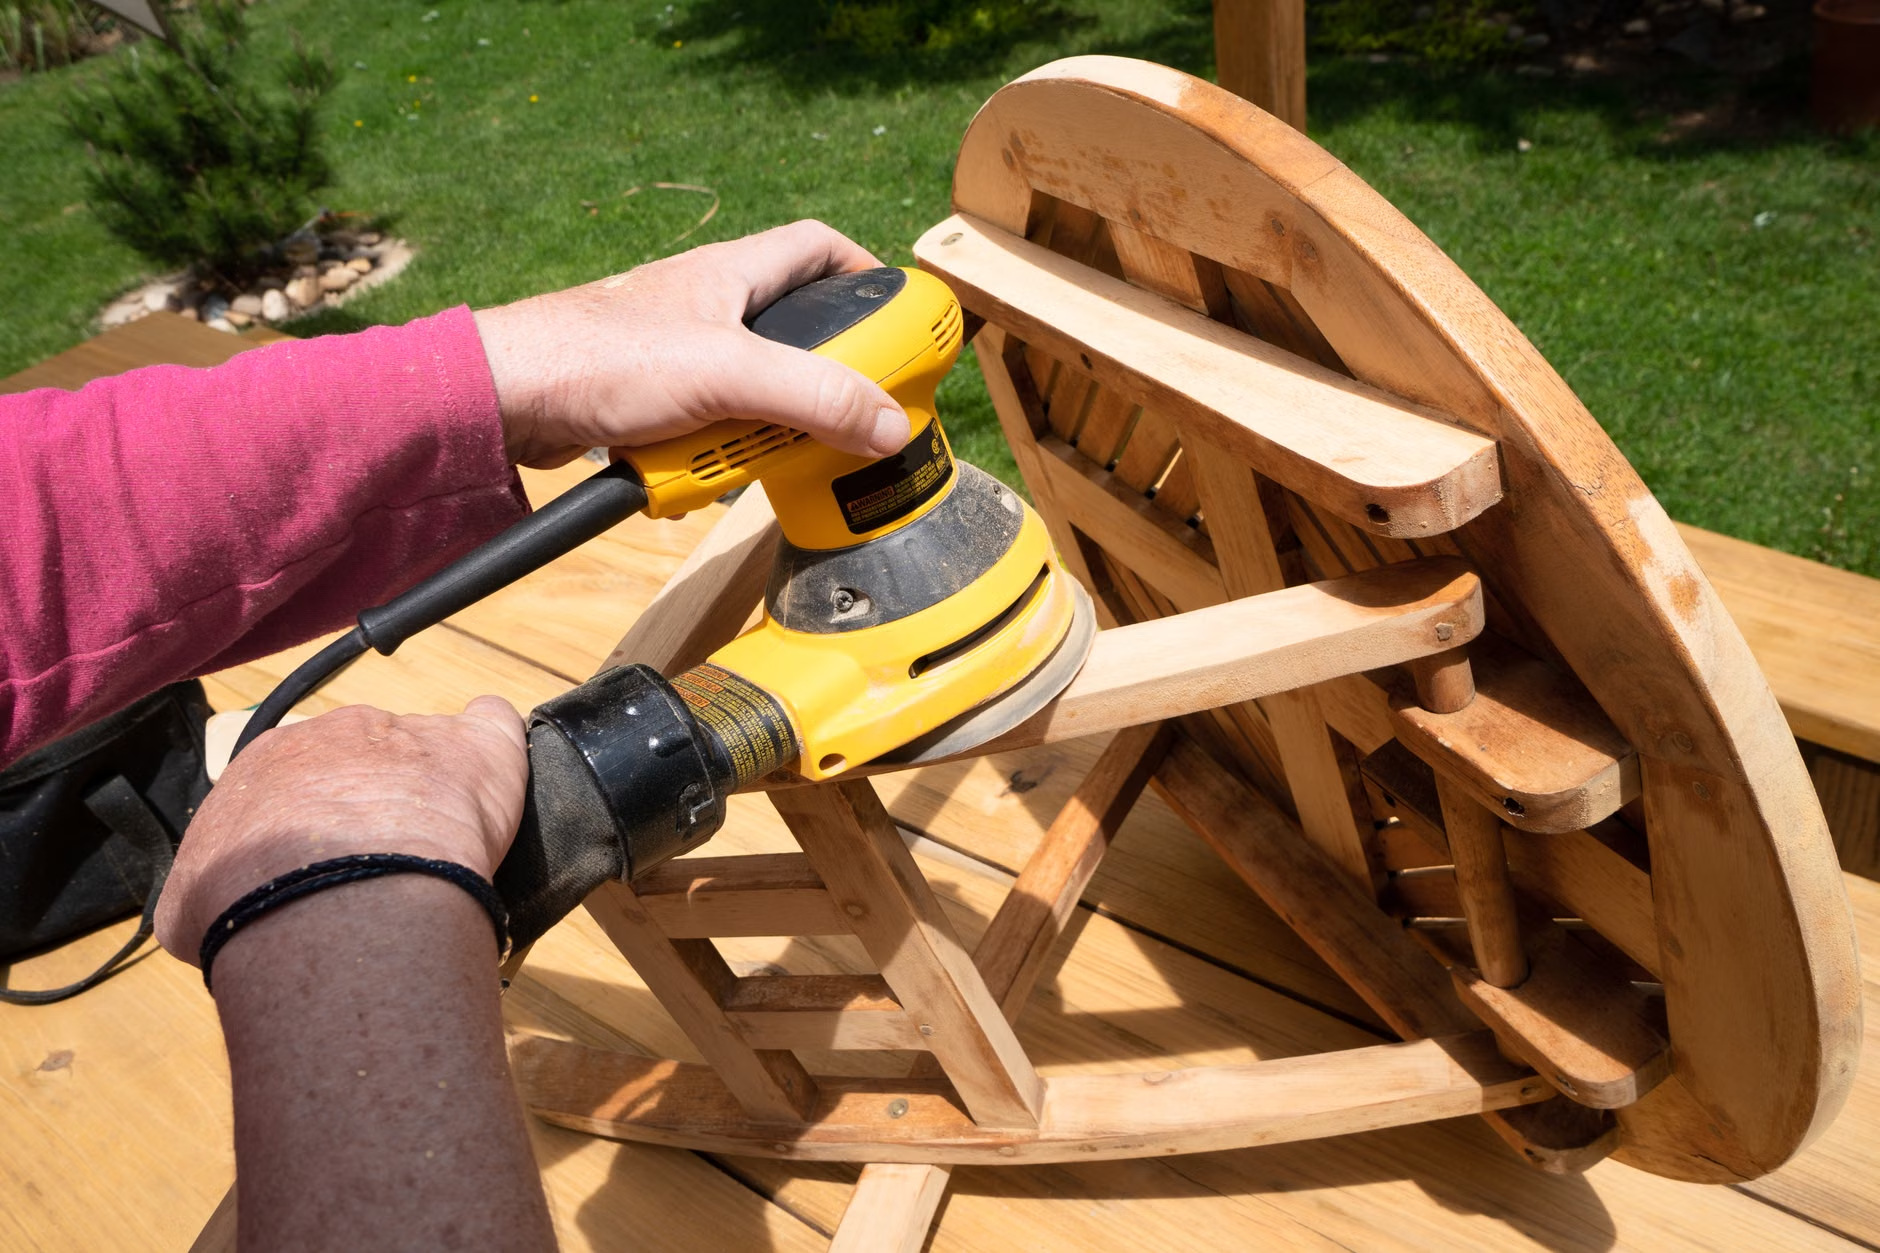
Step 2: Sanding and Surface Prep
Sanding is the most important step for a professional finish. Start with a coarse-grit sandpaper (around 80-grit) to remove the old finish, then move to a medium-grit (120-grit), and finish with a fine-grit (220-grit) for a smooth surface. Always sand in the direction of the wood grain to avoid unsightly scratches. If you are working on a desk surface that will see heavy use, ensure the wood is completely bare before applying any stain or paint.
Step 3: Reinforcement and Assembly
After sanding, tighten all joints. Use wood glue and a clamp to secure any loose parts. If the piece is missing screws or bolts, take the original to a hardware store to find an exact match. Do not try to force a screw that is slightly too large, as this can split the wood. If you are converting a piece of furniture—for example, turning a small dresser into a standing desk—ensure you are using high-quality hardware that can support the weight of a monitor or laptop.

Ergonomic Considerations for the Home-Schooling Environment
We often think of ergonomics as a concern for office workers, but children are equally susceptible to poor posture, especially when they are spending hours in a “temporary” setup. When you are restoring a vintage chair, you have a unique opportunity to customize it for your child’s body.
If you are re-upholstering a seat, don’t just pick a pretty fabric. Choose a high-density foam that offers firm support. Soft, squishy foam might feel comfortable for five minutes, but it will compress over time, leading to poor spinal alignment. Look for foam with a density rating of at least 1.8 to 2.0 lbs per cubic foot. This provides the right balance of comfort and support for long study sessions.
Consider the chair height relative to the desk. If you have found a perfect vintage desk that is just a bit too high for your child, don’t raise the chair to compensate, as this will leave their feet dangling. Instead, build a simple footrest. A small, wooden box or a stack of sturdy, flat books can serve this purpose. The goal is to ensure the child’s knees are at a 90-degree angle and their feet are firmly supported, which reduces pressure on the lower back and improves focus.
Integrating Technology Without the Clutter
One of the biggest challenges in home-schooling is managing the “tech sprawl”—cables, chargers, tablets, and headphones. When restoring a piece of furniture, plan for these elements from the start. If you are working on a desk, consider adding a cable management tray to the back. These can be purchased or easily made from a piece of wood or a repurposed plastic gutter segment mounted underneath the desk surface.
Think about where your child will charge their devices. Instead of running a messy power strip across the floor, consider mounting a power strip directly to the underside of the desk or the back of a cabinet. This keeps the floor clear of tripping hazards and makes the entire setup feel more integrated and professional. If your desk has drawers, consider using them to store chargers when not in use. A simple, clutter-free surface helps minimize visual distractions, which is crucial for children who may struggle with staying on task.
Proactive Cable Management Strategies:
- Use Velcro ties: Unlike plastic zip ties, Velcro is reusable and adjustable, which is essential if you change your device setup frequently.
- Label your cords: Use small tags to label which cord belongs to which device, preventing the “unplugging the wrong thing” frustration.
- Mounting: Use heavy-duty, double-sided mounting tape or small brackets to secure power blocks to the desk frame, keeping them off the floor and out of sight.
The Hidden Costs and Trade-offs of Restoration
While the goal is to save money, it is vital to be realistic about the costs of restoration. You will need to purchase supplies: sandpaper, wood glue, paint, primer, brushes, and potentially new hardware. For a full desk restoration, these supplies can add up to $50–$100 depending on the quality of the finish you choose. If you are buying a piece for $20, you are still well under the cost of a new, high-quality desk, but it is important to factor these costs into your initial decision.
Another trade-off is time. Restoration is not an instant fix. It is a process that requires drying times, multiple coats, and attention to detail. If you are a parent with limited spare time, consider a “light restoration.” This might involve a thorough cleaning, a light sand, and a simple application of furniture wax or oil rather than a full strip-and-paint job. This approach can be finished in a single weekend and often preserves the character of an older piece.

Maintaining Your Setup for the Long Run
Once your restoration is complete, maintenance is key to ensuring the furniture lasts throughout your child’s schooling years. Wooden surfaces should be dusted regularly with a microfiber cloth to prevent grit from scratching the finish. If you used a paint finish, avoid harsh chemical cleaners. A simple solution of water and a tiny drop of dish soap is usually enough for daily cleaning.
For the chair, if you upholstered it, consider using a fabric protector spray to make it more resistant to spills and stains. If the seat is removable, it’s a good idea to keep a spare piece of fabric or a secondary cover on hand. Accidents happen, and having a “backup” cover that matches the original can save you from having to do a full re-upholstery job if a spill ruins the seat.
Periodically, check the hardware on your desk and chair. Tighten screws every few months, especially if the piece is being used daily. Wood can expand and contract with changes in humidity, which can cause joints to loosen over time. A quick five-minute check-up once a semester is all it takes to keep your furniture in top condition.
Final Thoughts on Building a Productive Space
The beauty of restoring furniture for home-schooling is that you are building more than just a place to sit—you are creating a space that carries the value of effort and care. When children see their parents working on a project, fixing something that was once worn-out, they learn the value of maintenance and the importance of investing in quality. This is a subtle but powerful lesson that complements their formal education.
Don’t be afraid if the result isn’t perfect. A slightly imperfect, hand-restored desk has more character and history than anything you can buy off a shelf. Focus on the function, ensure the ergonomics are correct, and enjoy the process of creating a space that is uniquely suited to your family’s needs. Whether it’s a tiny nook in the living room or a dedicated study area, your effort will pay dividends in your child’s comfort and productivity for years to come.
For further inspiration and safety guidelines on handling older materials, you can refer to the Environmental Protection Agency’s guide on lead safety, which provides comprehensive information on safely managing older home environments. Additionally, consider checking your local government’s resources on waste management and furniture recycling to see if there are community workshops or tool-lending libraries available in your area to assist with your project.
Frequently Asked Questions
1. How do I know if a piece of furniture is worth restoring?
The primary indicator is the frame. If the piece is made of solid wood and the joints are tight or easily repairable, it is worth your time. Avoid pieces with severe water damage, deep wood rot, or structural components made of particleboard, as these are difficult to repair and often fail quickly under regular use.
2. What is the most common mistake people make when restoring furniture for children?
The most common mistake is prioritizing style over ergonomics. A beautiful vintage chair is useless if it is the wrong height for the desk or lacks proper lumbar support. Always test the chair and desk height combination before starting your restoration work to ensure your child can maintain a healthy posture during study sessions.
3. Can I use spray paint for a faster restoration?
Yes, spray paint can provide a smooth, professional-looking finish, but it requires careful technique. Always use a high-quality primer first to ensure the paint adheres correctly to the wood. Apply multiple thin, light coats rather than one heavy coat to avoid drips, and always work in a well-ventilated area. While faster, spray paint is less durable than professional-grade brush-on enamel, so be prepared for potential touch-ups over time.